Mittwoch, 2. Dezember 2015

Fremo Meeting Bremen 2015 - Nordtreffen

Ende November war es soweit und das Fremo Nordtreffen stand vor der Tür. Hier gibt es in Zukunft einen Bericht mit Fotos und Text: 
-
At the end of november we had our first fremo meeting in Bremen.
There'll be a report and more pictures soon:

Wir folgen dem Burney-Ocala-Local ein Stück über das Arrangement:
-
Let's chase the Burney-Ocala-Local on a part of the layout:

Early in the morning the BOL leaves Burney yard. The camera flash is the only light in the dawn.
-
Früh am morgen verlässt der BOL den Burney yard. Nur das Blitzlicht der Kamera hellt die Szene auf.

Arriving at the Lookout junction the sun rised over the horizon.
-
An der Lookout Junction angekommen übersteigt die Sonne endlich den Hoizont.

Some loaded log cars were added to train.
-
Einige beladene Holzwagen wurden dem Zug hinzugefügt.

Photo of BOL with GP38-2 GMTX 2624 a lead unit taken from the grain elevator in perish hill.
-
Das Bild des BOL wurde in Perish Hill vom Fenster des örtlichen Getreidespeichers aufgenommen.

After leaving Perish Hill the train passed Hampton Lumber.
-
Nachdem der Zug Perish Hill passiert hat, geht es vorbei an Hampton Lumber.

Leaving Hampton Lumber behind, the train rolls through the plains with Withehall Yard as the first destination.
-
Nachdem der Zug Hampton Lumber verlassen hat ging geht es durch die große Weite von Montana in Richtung Whitehall yard.

After some time the trains arrives in the small town of Emyfalls.
-
Nach einiger Zeit erreicht der Zug Emyfalls.

 A railfan spottet the BOL in the hills before arrivng in Emyfalls.
-
Ein Bahnfan sichtete den Zug in den Hügeln vor Emyfalls.


After switching some cars the train went on to Whitehall yard and later to its final destination Ocala.
-
Nachdem die rangierarbeiten in Emyfalls beendet waren ging es weiter nach Whitehall yard und letztendlich zum Ziel der Reise nach Ocala.

Montag, 26. Oktober 2015

Quebec Gatineau Railway - ERCO Mondial, Buckingham, QC - 5 US-Convention Rodgau - N scale module ocnstruction and operations workshop

While the 5th US Model Railoading Convention in Rodgau, Germany, I built a module as a part of a workshop about construction and operations with some collegues. My module consits of three American Shelf & Table Modules (www.americaN-st.de). The plan was to model the ERCO Mondial Sodium Chlorate Plant in Buckingham, QC. The plant is of course rail served by the QGRY - Quebec Gatineau Railway.
-
Während der 5. US Convention in Rodgau haben Peter, Claus und Ich einen Workshop über den Bau von Shelf & Table Modulen in N und Betriebskonzepte angeboten. Die Publikumsresonanz war sehr gut. Ich habe mich im Workshop für die Umsetzung eines Natrium Chlorit Chemiewerks in Buckingham, QC auf drei AmericaN-ST Module (www.americaN-st.de) entschieden.


The plant is served tri-weekly and receives empty short PROCOR Sodium Chlorate Covered Hoppers. After the cars are cleaned they are loaded under the tower and stored in the small yard.
-
Das Werk wird drei mal pro Woche bedient und erhält leere kurze PROCOR Natrium Chlorit Coverd Hoppers. Nachdem die Wagen gereinigt wurden werden sie unter dem Ladeturm befüllt und anschließend im kleinen Yard zur ABholung bereitgestellt.


I created a trackplan to match a dimension of 210cm (3 * 70cm). I kept the prototypical switch positions and just extendet the fourth yard track to the end of the module to allow more modules to continue th line.
-
Ich habe einen Gleisplan entwickelt, welcher auf 210cm die Gleisanlagen des Vorbilds direkt umsetzt. Zusätzlich habe ich das vierte Yardgleis bis zum Modulende verlängert, um dort weitere Module anschließen zu können.


I then printed the track plan an transferred it to the module boards.
-
Anschließend habe ich den Gleisplan in eine Konstruktionszeichnung umgewandelt, ausgedruckt und auf die Holzböden der Modulteile übertragen.


While the workshop I built the modules with americaN-ST kits and used Atlas N code 55 #7 switches and flex track. In the picture I overlayed the phote with the drawings of the building, trees and rail cars... nice ANYRAIL feature.
-
Während es Workshops habe ich dann die Module mit american-ST kits gebaut. Als Gleismaterial kam wie immer Atlas N Code 55 #7 Weichen und Flexgleis zum Einsatz. Ich habe über ein Foto Gebäude, Landschaftelemente und Fahrzeuge gelegt.


At the end of the workshop all three moduleparts were build. Tracks were glued and soldered, backdrops were glued and mounted. Also the Electrical connections, feeders and DCC panels were connected, placed and mounted. Missing are switch machines, landscape, buildings an Sodium Chlorate covered hoppers. It was much fun to build to the realize the project that near to the prototype.
-
Am Ende des Workshops waren alle drei Modulteile fertig gebaut. Gleise ware aufgelötet und geklebt, Hintergründe waren geklebt und montiert. Ebenso waren die elektrischen Verbindungen, die Gleiseinspeisungen und DCC Buchsen fürs Loconet angeschlossen, platziert und montiert. Es fehlen noch manuelle Weichstellantriebe, Landscahft, Gebäude und natürlich Natrium Chlorit covered hoppers. Der bau des moduls hat richtig Spaß gemacht. Die vielen Fragen der Workshopteilnehmer haben zwar ein effizientes Arbeiten verhindert, aber viele Fragezeichen in den Gesichtern in Ausrufezeichen verwandelt. Die Umsetzung so nah am Vorbild zauberte mir dann auch ein breites Grinsen ins Gesicht.

Freitag, 23. Oktober 2015

Quebec Gatineau Railway QGRY - First Motive Power - Micro-Trains Line SW1500 QGRY 1504

It's been a long time since I posted some model railroading stuff. Job and house didn't gave me any time for the hobby. Tomorrow starts the US Railroading Convention 2015 in Rodgau, Germany (small town near Frankfurt) and me and some collegues are participating. We are doing are workshop in building shelf & table modules so I needed some prototypical motive power for my roster. My friend Claus owns an Atlas QGRY GP40-3 as Roadpower so what about a small switcher? I decided to model one of QGRY EMD SW1500 series switching locomotives. I painted it with True Line Colors and applied Microscale Decals. Some Detail parts are still missing, but for the show it'll we all right.
-
Es ist schon eine Zeit lang her, daß ich etwas Zeit für die Modellbahn hatte. Umbaumaßnahmen am Haus und Streß bei der Arbeit ließen mir kaum Zeit für das Hobby. Morgen 24.10.2015 findet in Rodgau bei Frankfurt die US Convention 2015 statt und ein paar befreundete Modellbahner und ich nehmen teil. Wir zeigen in einem Workshop wie Module geplant, gebaut und gestaltet werden. Für diesen Einsatz wollte ich natürlich eine Lok der QGRY mitnehmen. Mein Freund Claus besitzt eine Atlas QGRY GP40-3, welche sich gut als Roadpower anbietet. Also wie wäre es mit einer Rangierlok? Ich entschied mich für eine mich für eine unlackierte Micro-Trains Line EMD SW1500, welche ich mit True-Line Colors und Microscale Decals in QGRY 1504 verwandelte. Leider fehlen noch ein paar Teile und auch ein paar Decals, aber für die Messe muss es reichen.

At first I sprayed the stripped shells with Tamyia primer.
-
Als erstes habe ich die Gehäuse mit einer grauen Grundierung von Tamyia vorbehandelt.

After the primer was dry I used some 2000 wet sanding paper so get a sommth surface and painted the shell with True-Line Colors G&W Orange and Yellow.
-
Nachdem die  Grundierung trocken war habe ich einige Stellen mit 2000er Naßschleifpapier behandelt und anschließend mit True-Line Colors G&W Orange und Gelb lackiert.

The next step was to save the paint with a gloss coat. This is an important step before applying the Microsacle Decals.
-
Im nächsten Schritt wurde die Farbe mit glänzendem Lack gesichert. Die erlaubt auch das aufbringen der Microscale Decals.

On the Left is a stock Atlas QGRY GP40-3m with black painted trucks and my custom painted MTL SW1500 on the right. I installed a Digitrax decoder to opearte the loco on my DCC system.
-
Links eine Atlas QGRY GP40-3m und recht meine lackierte MTL SW1500. Ich habe einen Digitrax DCC Dekoder passend für die Lok eingesetzt.

I programmed a smooth switcher style speed curve that allows the locomotive to crawl very slow while switching.
-
Ich habe die Lok mit einer rangierloktypischen Geschwindigkeitskennlinie programmiert. Dadruch ist ein weicher Lauf und eine langsame Kriechgeschwindigkeit möglich.

To be continued after the show...
-
Weiter geht es nach der Convention...


Donnerstag, 18. Juni 2015

Still alive - Prototypical Tabletop Module Kruger Inc.trois-Rivières, QC, Canda

Since we bought a house last year, there wasn't much time to spend for my hobby. But if a thought gets you and keeps you thinking of a module and how it can be done, it will be done.
-
Seit dem Hauskauf (Ende letzten Jahres) war die Zeit fürs Hobby leider sehr knapp bemessen. Aber wenn sich eine Idee im Kopf festsetzt und man immer wieder überlegt wie man es umsetzen kann, setzt man es irgendwann um. Der Text bleibt vorerst in Englisch, wenn ich mal Zeit habe folgt auch die deutsche Übersetzung.


After spending our 2014 summer holidays in Canda (Ontario and Quebec) I changed my modeling location from Californias west coast to St. Lawrence region in east Canda. My locomotive roster of SP Units will be sold or custom painted to new roads. My new home operator will be the Quebec Gatineau Railway (QGRY) (French: Chemins de fer Québec-Gatineau Inc.) a Genesee & Wyoming company. Due to power shortage on the Huron Central Railway (HCRY) and Interchange with the St-Laurent et Atlantique Quebec (SLQ) also some of these units will appear. 

During our trip we spent some nights in Trois-Rivières, QC. There I discovered the Kruger Inc. Paper Mill served by the QGRY. Here you can find some holiday pictures...

My first Idea was to build the Papermill warehouse and the storage spurs according to the Fremo-AmericaN Module Standard. This brought me to a transport problem: The Kruger module group should be at least 3m in length and 40cm in width to demonstrate the space. Also it always looks more prototypical to store a few cars with much space left in the yard then storing 5 cars on a 5 car siding. A transport volume of 60cm * 40cm * 110cm was way to big for a small sized convertible car like mine.

So I changed the track plan and created the scene on 5 TableTop Modules. Each module has a length of 70cm, so the group was even longer then the first plan. The transport volume decreased to three boxes each 74cm * 20cm * 30cm


Trying to push my modeling skills to a higher level I used google street view screenshots and some of my own photos to create realism. Of course - this track plan is compressed and the Rona building moved to the other side of the rails. This was needed because of an easy access to the rails while derrailments or uncoupling. Also the table top standards backdrop of the portable modules helps low profile buildings to look more realistic. 


Everything started with building the modules. I went to my local home improvement center and ordered 5 backwalls, 5 front plates and 5 base plates. At home I assembled the modules using the laser cut american tabletop starter kits. Every kit also contained the electric connectors, track PCBs, printed Backdrops etc.


To align all tracks I drew some orientation lines on the olive green painted modules. The paint is necessary, because it protects the wood against the water of the ballast and scenery glue.
The PCB ties exactly match the Atlas turn out System (the space between two tracks).
The Atlas Code 55 tracks were fixed with a thin layer of 100% white glue. When the glue was dry I soldered the tracks to the PCB ties and cut them with the ROCO/Atlas track saw.


I pre soldered all Atlas turn outs and tested the frog connection. I noticed that the throw bars of 80% of the turn outs was very unsteady, so I drilled new holes in the middle of the bar that fixed this issue. The turnouts were glued and connected with the rest of the tracks.


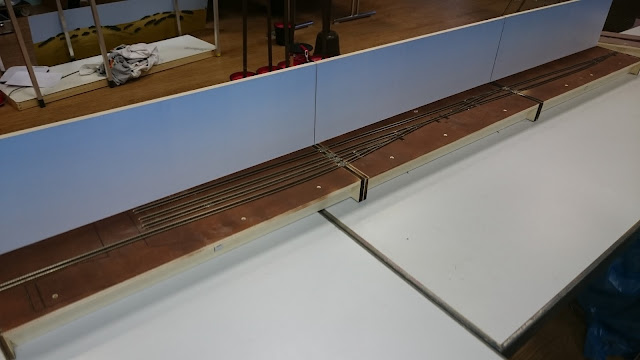
The wiring is very simple. The front rail is always connected to the front socket/plug. The terminal strip at the top at the end/beginning of the module is needed so possibly divide modules in seperate booster districts. There was not enough Space for my favored Blue Point switch machines, so I built some simple mechanical turn out switching machines.


Roads of 1mm balsa wood and paper board mock ups of the buildings demonstrate the future look of the module group.


I weathered the rail with the walters rust painter. After 2-3 Layers it looked perfect!! Keep in mind that the ballast is still missing. Compare with my photos...


I used ASOA ballast for the middle and right track and a little bit brigther Walthers ballast for the left one. The different colours are according to the protoype. QGRY seemed to have done some mow work here.


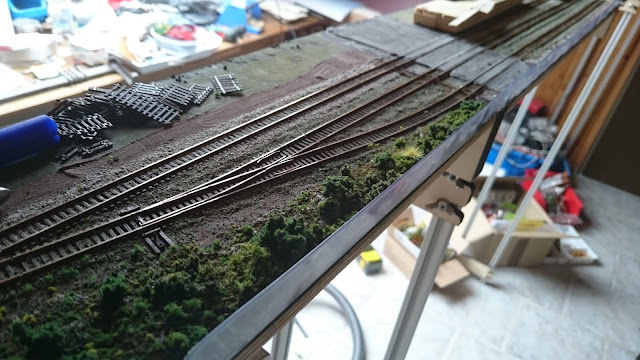
To recreate the nature of this region along the St. Lawrence I picked up some small branches from our garden, put some moss on it and covered (after appling a layer of spray glue) it with different turf mixtures. I still had some small NOCH conifers that looked like clones. I Cut them into different sizes and put some turf blends over them.


Her is a first photo of the trees and scenery. Many details are still missing (building/road/poles/paint/weathering/...), but this is the right direction...

So far :)

Fremo Meet in Delmenhorst in 2022